01 09 10
Showing posts with label Indoor Boredom Busters for Active Kids. Show all posts

Tuesday, May 7, 2013

Game to Help Kindergartners Identify Numbers 1-30 "OOPS"

Last week, Big Guy attended "Kindergarten Round-Up".  He's so excited to go to school next year but it makes Momma a little sad.  Wow!  They grow up so fast.  Tear.  Anyway, the teachers sent us home with a card game called "OOPS".  The purpose is to help children learn to identify numbers 1-30.  Big Guy thinks the game is fun.  I lost the original instructions (Oh, well) so I'll share the directions we made up!

This is how we play:


  1. You need a deck of cards with numbers 1-30 and 3 cards that say "OOPS".
  2. Spread the cards out on a table face down.
  3. Take turns choosing a card.
  4. If you are able to correctly identify the number on the card you get to keep it. (We usually get two attempts).
  5. If you aren't able to identify the number, you must put it back on the table face down.
  6. If you draw an "OOPS" card you must return one of the cards from your save pile facedown on the table.
  7. The first person to correctly identify 5 numbers and put them in numerical order is the "Winner".
Have fun playing!

Wednesday, April 24, 2013

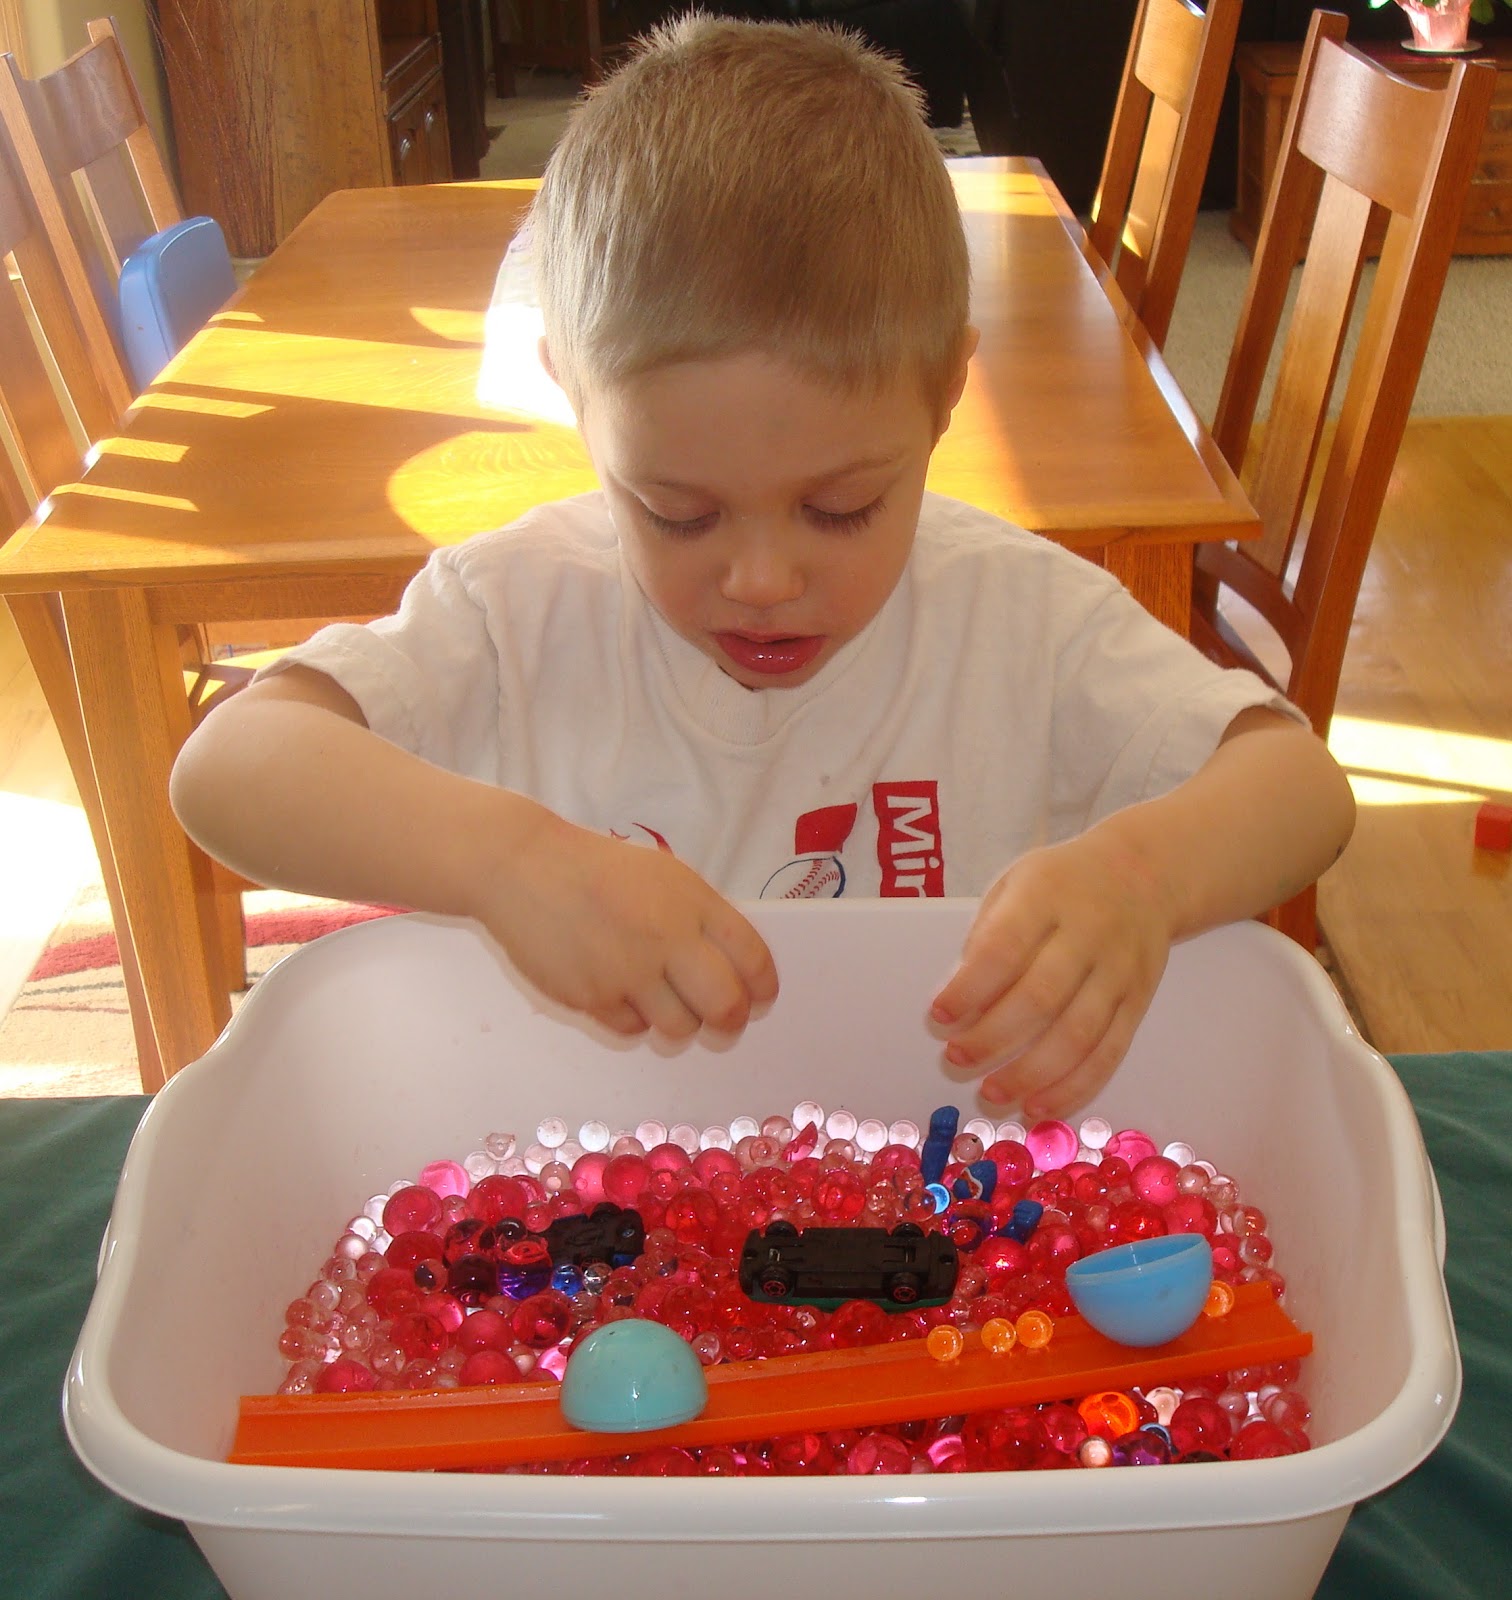
Water Bead Sensory Bin

Sometimes Little Guy doesn't want to participate in our craft projects but still wants to feel like he is part of the action.  A water bead sensory bin is a simple solution!  He LOVES the slippery texture of the water beads and there is literally no mess, which I LOVE !

This is what we did:


  1. I purchased a bin at the Dollar Store.
  2. I purchased four containers of Water Beads (Floral Section) at the Dollar Store.
  3. I put little toys in the bin.
  4. Little Guy played next to Big Guy while he completed a project.  Super!
 
The water beads are definitely a CHOKING HAZZARD.  Please don't let a child who puts toys into his mouth play with water beads!!!  I store the water beads in a sealed container.  I think they will last indefinitely.  They feel like slimy/wet, smushy super balls.  They even bounce a little bit!


Thursday, February 21, 2013

Trampoline Fun!

You don't need to go to an expensive trampoline park when you can build one in your living room!  We've been doing this one for a couple of years.  It's always a hit with the boys because they ask to do it often and I say "yes" occasionally.  They LOVE it.  I don't mind as long as they help put the cushions away when we are done. :)

This is what we do:


  1. We took all the cushions from our couches (they're pretty thick) and laid them out on the floor. (We have 3 couches)
  2. We cover the cushions with a blanket (and pretend that it is an ocean or a pool).
  3. We jump in!
 
The rule is no backwards jumps and that each child has to take turns.  That usually works (but not in the above video. Probably because I was recording them instead of watching them closely.  Thankfully, noone was hurt during the recording of this video.)  


Plastic Eggs and Colors!

My active Little Guy is trying to learn his colors.  We decided to spice up his "lessons" by playing a fun game.  Both of my boys LOVED it! 

This is what we did:

 
  1. We hid plastic eggs all over the living room.  We hid them in easy to spot areas.
  2. After the eggs were "hidden" I told the boys to "GO".
  3. They ran around the living room collecting one egg at a time and set it in the basket.
  4. They had to say the color as they put it in the basket.  Big Guy of course had no problem with stating the colors but I had to say the color for Little Guy most of the time.
  5. We did it again and again!
 
I adapted this game for Big Guy too.  After the boys collected the eggs, we sorted them, counted them, laid them out in patterns, guessed which pile had the most - least, etc...  This was a high energy activity.  I used an adaption of the same game when I taught summer camp A LONG time ago.  We collected balloons and the kids had to say the color of the balloon in spanish.  We used a stop watch to see how fast they could do it.  It was a ton of fun.  You could also use letters!

6, 5, 4 adding dice game!

Our family LOVES to play games.  We've been playing the game 6, 5, 4 a lot lately to help cure our winter boredom!  Its a great game because it moves quickly, helps our Big Guy work on adding, and because of its competitive nature its exciting.

Here is how you play:


  1. You need 5 dice.
  2. You need 5 chips (for about an 1/2 hour game) for each person.  We've used other objects instead of chips - such as bow tie noodles. (You can also play without them, it just wasn't as fun for our family)
  3. Everybody throws a chip into the "pot".
  4. Everybody gets one turn to try to score the highest number.
  5. Whoever gets the highest score wins all the chips in the pot for that round.
  6. Continue to play until someone is out of chips.
  7. The winner is the person with the most chips at that point.
Here is how you score:
  1. Each person gets three consecutive tries to roll the dice.
  2. You must get a 6, 5, and 4.  If you roll one of those numbers you set it off to the side.
  3. If you get those three numbers within 3 shakes, you get to add up the remaining two dice.  That is your score.
  4. If you get a 6,5, and 4 before you have shaken 3 times, you can re-roll the remaining two dice (up to 3 times) in order to get a higher score  BUT if you get a lower score that's what you get....RISK.
The player's score in the above picture would be 5.

This is a fun game to play as a family.  We're at the stage where games are becoming more fun.  Our Big Guy is able to play more complex games than CandyLand and his losing doesn't result in an hour beneath the table!  LOVE that!  (In our house,the losers have to shake hands with the winner and say, "Good Game".)

Tuesday, February 19, 2013

Race Car Slide

We got another great idea from Pinterest this morning!  Thanks, The Contemplative Creative for the inspiration for our amazing car jump, ramp, totally cool, and exciting cardboard slide!  The boys LOVED the excitement!

This is what we did:


  1. We got a big box from our garage.  I'd been wanting my husband to throw the t.v. box away for a long time.  He must have known we would find another purpose for it.  I used a scissors to open it up the long way!
  2. We put a big bin at the bottom of the stairs.
  3. We collected all of our matchbox cars and put them at the top of the stairs.
  4. We used masking tape to attach the cardboard to the top of the stairs.
  5. The boys took turns sending hundreds of our toy cars down the slide trying to get them to land in the big bin!
  6. It was pure joy as we watched the cars zoom down the slide, make a big jump and land in the bin!  So fun!
The Contemplative Creative suggested that the kids slide down the cardboard.  Without carpet on our stairs and the steep grade of the stairs that was strictly prohibited at our house!  My boys certainly thought of the idea to slide down themselves - So this was a CLOSELY SUPERVISED activity.  This was a high energy activity!  LOVE.  Oh, and I LOVE our new t.v.!

Wednesday, February 13, 2013

Paper Streamer Fun


We needed something active to do to stay cool during a hot summer day!   Perhaps we will try this activity again this weekend.  Minnesota winters can be cold!


This is what we did:


  1. I gave the girls some paper streamers and wall-safe tape (I used blue painters tape). 
  2. I told the girls to "go crazy" with the streamers; taping the streamers from one side of the room to the other to create a paper streamer maze.  It got interesting, but was a lot of fun!  
  3. Once they found their way out of the streamer maze, I asked the girls if they could start on one end of the paper streamer maze and climb through to the other without pulling the streamers off the wall!  

The girls LOVED it.  It kept them busy for awhile and there was a lot of laughing!  As a mom, I LOVED it to.  The kids set it up and the kids took it down!  You gotta LOVE that!  This type of streamer maze is adaptable to most indoor settings.  Use a hallway if you'd prefer to use less paper streamers!  Next time we do this activity, I may try using paper streamers in rainbow colors. Wouldn't that be LOVELY?

Thursday, February 7, 2013

Beach Party - Cloud Sand

We discovered that it doesn't need to be summer in MN to play with sand!  We found a website teaching us how to make cloud sand that we can use INSIDE the house!  We LOVE it!  Here is the link:  here  The "sand" is super soft and has a great consistency to it.  My Little Guy made a huge mess on the floor and I was able to sweep it right up.  I looked at the mess and was pretty skeptical, but it was honestly a breeze to clean up (and to make).

This is what we did:

 
  1. In a large bowl, I added about 12 cups of all-purpose flour.
  2. I added about 2.5 cups of vegetable oil.
  3. With a spoon I stirred the ingredients.
  4. Once the oil was absorbed, I used my hands to mix it until the flour was lumpy.
  5. I dumped it into a 9X10 brownie pan and added a few little toys and let the boys play!
My Little Guy LOVED this.  He played for about an hour.  I  enjoyed playing with it too.  Its better than outdoor sand because its so soft and its easily moldable.  I'm storing it in a bin.  I hope it lasts for awhile - at least the rest of the winter until we can get outside and really go to the beach!


Sunday, February 3, 2013

Serve Up Some Love!

There is no greater LOVE than to give your life for a friend!  (John 15:13) St. Valentine sacrificed his life so that others could experience great LOVE.  (For more on St. Valentine follow this link:  Here) For Valentine's Day express your gratitude for those who sacrificed greatly caring for all of God's children by sharing cookies with someone who may not have reason to celebrate LOVE.

This is what we will do:


  1. Make heart shape cut-out sugar cookies.
  2. Make frosting.
  3. Make sprinkles.
  4. Package and deliver our cookies to our unsuspecting love victim :)
Cookie Recipe: 
These cookies are fantastic!  Seriously, they are the best sugar cookie I've tasted!
*  1 cup butter (softened)
*  1.5 cups powdered sugar
*  1 egg
* 1 tsp. vanilla
* 2.5 cups flour
* 1 tsp. baking soda
* 1 heaping tsp. cream of tartar.
Bake at 350 for 8 minutes.

I just threw all of this stuff in the mixer.  It didn't mix super well, so I formed a ball with my hands.  Then I put it in the refrigerator for awhile.  I'm not sure if that step is necessary.  When I took it out of the fridge I formed a smaller ball with my hands (the dough needed to be softened a bit).  I rolled it out on the cutting board with a little flour and cut out heart shapes!  Easy Peasy!  It makes about 3 dozen cookies.

Frosting Recipe:
*  1 cup shortening (I didn't have any so I used a cup of softened butter)
*  1.5 tsps Vanilla
*  1/2 tsp. lemon extract
* 4.5 cups sifted powdered sugar (I don't sift)
*  3-4 Tbsp. milk

I threw all of this stuff into the mixer.  The milk made it creamy.  I separated it into 3 containers and added food coloring to get the different colors.  I made blue, pink, and yellow!

Sprinkle Recipe:
*  1/4 cup sugar
*  Food Coloring
Bake at 350 for 10 minutes.

I filled a muffin tin with 1/4 c. sugar and added food coloring.  Then I stirred each one and set it in the oven.  After 10 mins the sugar hardens and I scooped it into little bowls.  I had to smash the sugar with a spoon to get rid of the clumps.  Its super fun to have the variety of vibrant colors without the expense of purchasing the different bottles of sprinkles!