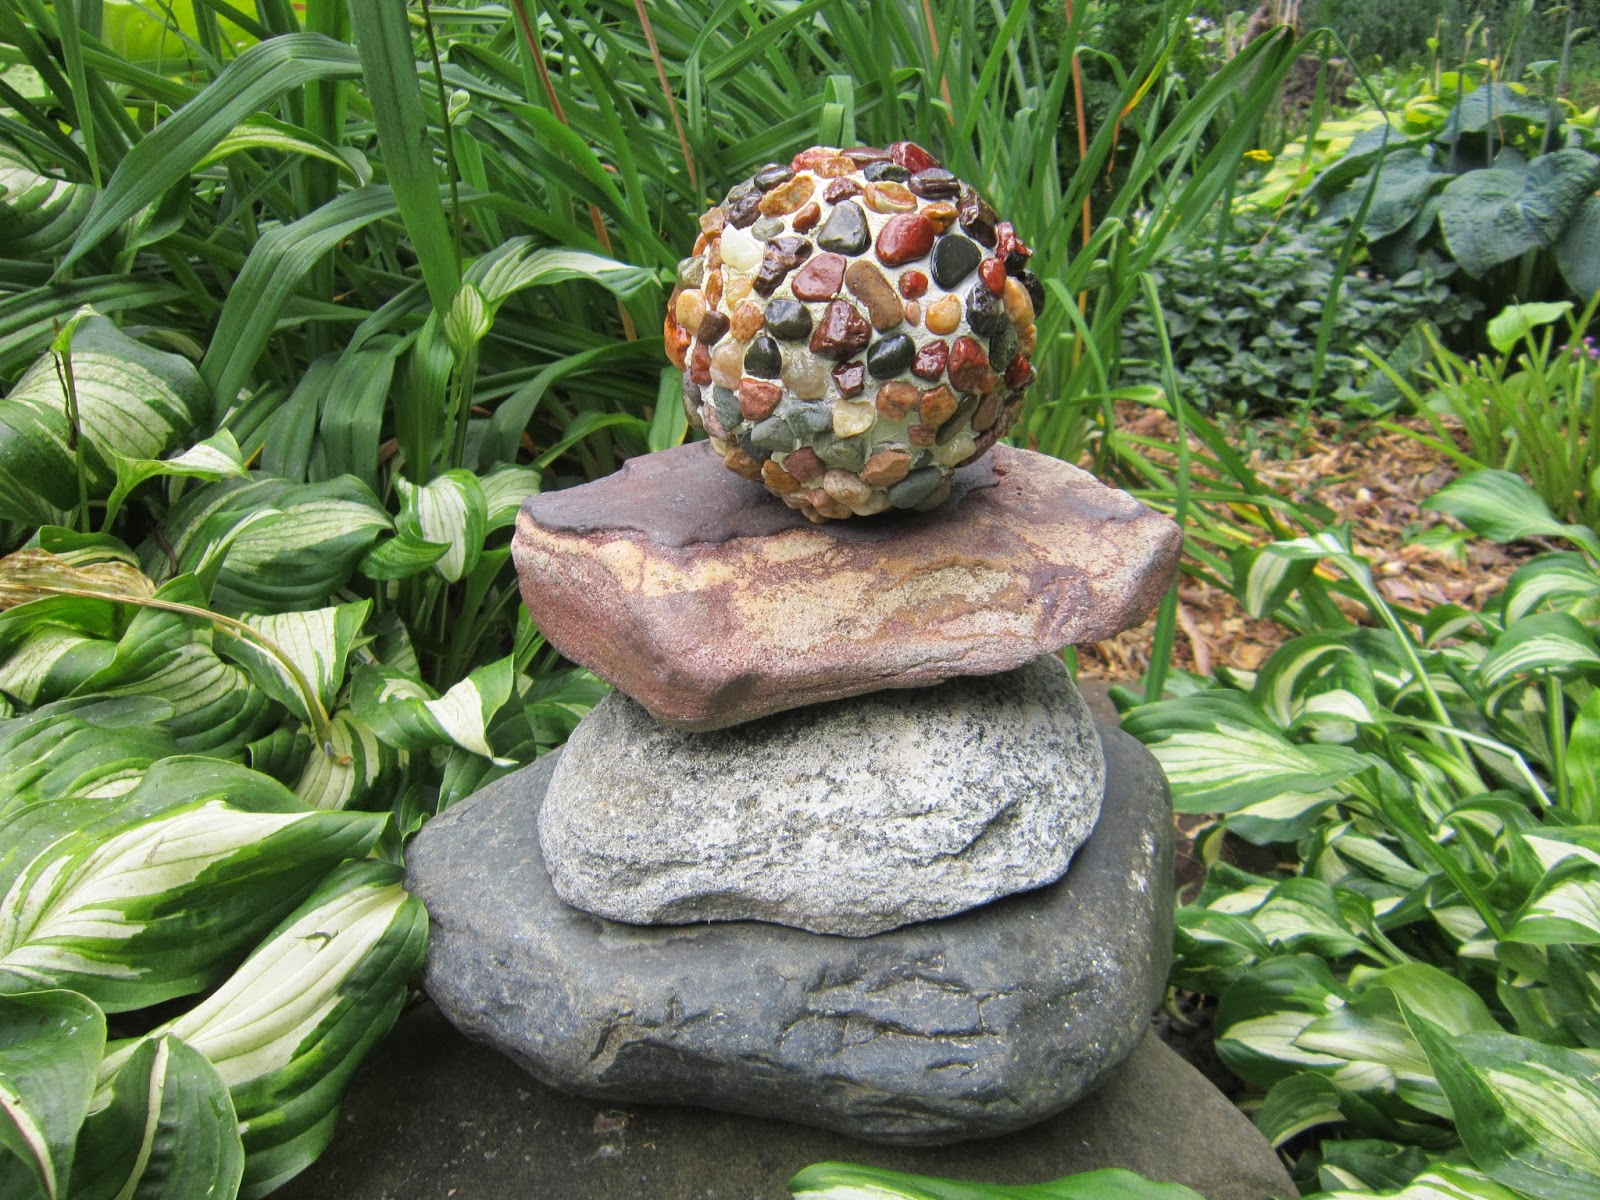
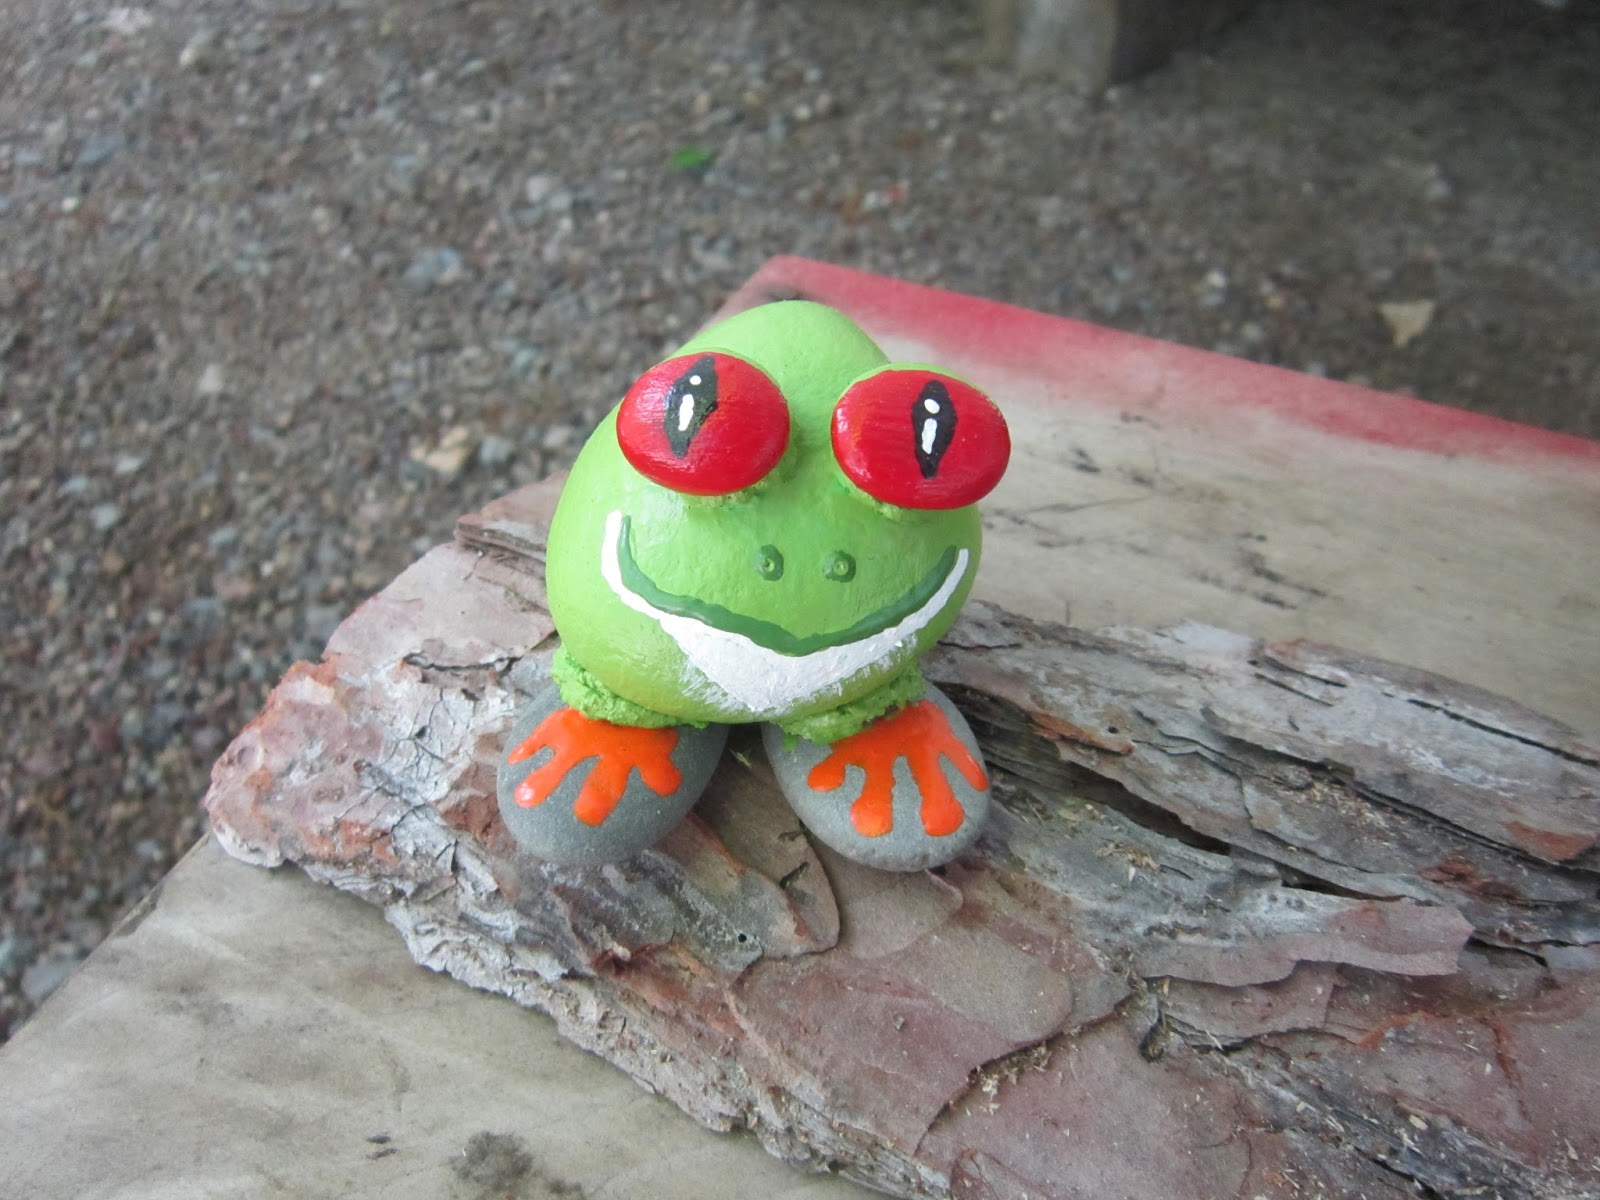
I LOVE collecting rocks of any shape or color. I find most of them anywhere I LOVE to walk, especially along lake shores and paths. It's fun to bring them home, wash them up, and display them in my garden. I've used a variety of containers but found that repurposing old colanders work best because rain water drains easily from them. I also found that some rocks lose their luster when dry so I sometimes spray them with a clear gloss acrylic coating that I purchased from a craft store.
I LOVE this activity because I can hunt for rocks with friends and family of any age. Some hold special memories and they all look beautiful wherever I put them!
LoveNLoot is created by three sisters and their mom. This page is dedicated to the Love they have for their families and all the Loot that comes with having one! Take some time to browse the content by clicking on the categories on the right hand side. Enjoy!
Showing posts with label Crafts for Adults. Show all posts
Saturday, July 4, 2015
Friday, November 1, 2013
Painted Hydrangea
I LOVE decorating with hydrangea because it's so easy and arrangements looks great all year long. I simply picked clusters after they turned green (the dried stage) and lightly spray painted them maroon to match the décor in my room. That's it! So easy and so pretty!
FYI: If I pick clusters when they first bloom (white), and put them in a vase with fresh water, they will last a week or so. If I pick them after they turn green, they last all year with NO water. I can also pick them after they turn brown for the same affect. This Christmas I plan to spray paint brown clusters white to imitate a light dusting of snow. I might decorate a wreath or use them in a display on my fireplace mantle. Either way, it will be fun to bring "the outside in" and stay cozy warm in the process!
Sunday, October 13, 2013
Stone Garden Design
My friend LOVES to make crafts while camping. With a few supplies she brought from home and some colorful stones she collected from the lake shore, she created this awesome stone design for her garden.
This is what she did:
- She covered half of an old softball with Premixed Adhesive Grout but any size ball will work.
- She created a circular design by placing small stones in the grout then randomly placed other stones around it.
- She let it dry overnight.
- The next day she spread grout on the remaining half of the softball and continued covering it with small stones.
- When dry, she sealed it with a clear gloss acrylic coating spray.
- She layered a variety of flat stones in her garden and placed her stone design on the top.
Sunday, August 4, 2013
Painted Stones
My friends LOVE painting rocks. They also LOVE the search. Finding the right size, shape, and smoothness can be quite an adventure. It's so fun to see them turn simple river stones into beautiful creations. It's also fun when I'm gifted with one of their treasures. Thanks, friends, for sharing!
This is what they did:
- They chose a stone for each critter.
- They followed instructions from The Art of Painting Animals On Rocks by Lin Welford.
- They added their own personal touches using acrylic paint, brushes, and even toothpicks for small detail.
- They sprayed their critters with clear acrylic paint to preserve the finish and make them weather resistant.
A Star Of Sticks
Nature offers many gifts of beauty. Fallen birch branches are one. I LOVE that they can be used for wonderful, unique projects, and are often "free for the taking!" With a little wire, a cutter, and a few birch sticks, I created a hanging star for my door.
This is what I did:
This is what I did:
- I made a paper template of a star. Mine measures 14" x 14".
- I cut birch branches to fit within my template.
- I wired them together with 9 gauge wire. You can also tie them with fish line.
- I attached a wire hanger.
Friday, July 5, 2013
Glittering Sun Catchers
My friends and I LOVED making these glittering sun catchers. It was a fun camping project that my friend shared with us one cloudy afternoon while sitting around the campfire. After a quick refresher course on tying fish knots, we were ready to get started. Even though the fish in the lake weren't biting, this lucky catch was quite a trophy!
This is what we did;
- We found birch branches to hang our strings of beads.
- Starting at the bottom, we tied fish line to a large bead leaving enough line to make strands of various lengths and to later tie them to the birch branch. We added a small bead between larger beads to help separate them and make them stand out.
- We added a wire hanger and hung them in the sun!
Easy Frosted Glass Containers
My friends and I LOVE camping. We also LOVE the opportunities it brings to make crafts together. Sharing ideas and supplies go hand in hand as we put our creative minds to work. We started out this camping season making sprayed glass containers. My friend decorated a pretty vase for her "soon to be born" granddaughter and I made a frosty container to set in my bathroom.
This is what we did:
- We decorated glass containers with stickers (shapes and letters) and rubber bands. You can use letters to write a message or personalize one with a name.
- We lightly sprayed the containers with Frosted Glass. Two coats worked best.
- When completely dry we carefully removed the stickers and rubber bands.
Saturday, April 13, 2013
Marshmallow Treats - Flower Bouquet Take Two!
I decided to try my own version of my Aunt's marshmallow flower bouquet. I think its cute! I'm going to bring it to the birthday party for my twin neice and nephew! It was super simple to make!
This is what I did:
This is what I did:
- I purchased supplies at the Dollar Store. (cute flower pot and styrofoam)
- I gathered my supplies from home (skewers, Easter grass, cupcake liners, and toppings: white chocolate chips, mini chocolate chips, mini cherry chips, and sprinkles (I used ice-cream sprinkles).
- Cut skewers to size. You want the tallest in the middle and get shorter as you work your way out.
- Slip the marshmallows onto skewers and place in the freezer.
- Melt the white chocolate in a glass bowl in the microwave.
- Put the toppings in cups.
- Take the marshmallows out of the freezer.
- Dip a marshmallow in the melted white chocolate and then dip into the topping.
- Slide a cupcake liner onto the skewer.
- Poke the skewer into the center of the styrofoam inside the flower pot. Make sure you do the tallest skewer first.
- Continue the process until the flower pot is full.
- Place the entire thing in the freezer until you are ready to display and serve.
- Before you display and serve add a little Easter grass to the top of the flower pot.
Isn't it cute? It took me about 30 minutes to make two flower pots (1 for each kid). The entire project cost me less than $5.00 if I don't include all the leftover toppings that I have! I think kids would be able to make their own marshmallow treats. Wouldn't it be fun to set up a toppings bar??
Wednesday, April 10, 2013
Adjustable Straps
I recently made some aprons for several people in my family. When "one size didn't fit all," I added an adjustable neck strap. It was so easy and I LOVE that it fit everyone!
This is what I did:
I slipped the left strap into the first clip and sewed the strap to the backside of the same strap (Photo 1).
I slipped the right strap into a second clip and then inserted the right strap into the clip of the left strap (Photo 2).
I pulled a large loop in the second clip of the right strap so I could slip the end of the right strap through the clip again but inside the large loop (Photo 3).
I finished by sewing the right strap to itself near the end (Photo 4).
Adjustable straps can be used for many items. I'd LOVE to put one on a beach bag!
This is what I did:
I slipped the left strap into the first clip and sewed the strap to the backside of the same strap (Photo 1).
| Photo 1 |
| Photo 2 |
I pulled a large loop in the second clip of the right strap so I could slip the end of the right strap through the clip again but inside the large loop (Photo 3).
| Photo 3 |
| Photo 4 |
Adjustable straps can be used for many items. I'd LOVE to put one on a beach bag!
Sunday, March 31, 2013
Marshmallow Flower Bouquet!
My Aunt Lorraine makes amazing desserts. They taste delicious and look beautiful. The kids LOVED the marshmallow treats she made for Easter. I asked her if I could take a picture and post.
This is what she did:
These were a perfect treat for Easter but I think it would be adorable for any type of family gathering or shower. Thanks Aunt Lorraine!
This is what she did:
- Place marshmallows on a large stick (you can find the white ones she used in the baking aisle).
- Dip the marshmallows in water (wipe of excess water - not dripping, on a paper towel).
- Dip the damp marshamallow into different colors of sprinkles.
- Punch hole into a mini cupcake liner and move it close to the marshmallows.
- Place floral styrofoam into a decorative pot.
- Push the sticks into place.
- Fill in the spaces with Easter grass.
- My aunt tied a a pretty ribbon around the pot to finish the look.
These were a perfect treat for Easter but I think it would be adorable for any type of family gathering or shower. Thanks Aunt Lorraine!
Friday, March 29, 2013
Well Wishes
Express your LOVE and concern for family and friends by sending "Well Wishes." Instead of throwing out your chicken and turkey wishbones, use them to decorate a personal gift made especially for them!
This is what I did:
I made my favorite homemade turkey noodle soup for one of the gifts and put the soup in a canning jar. When I bring a meal to someone ill, I like to use containers he or she may keep and not worry about returning.
For my other gift, I filled a decorative jar with colored Epsom salt. A favorite recipe I LOVE to use is:
This is what I did:
- I washed and saved turkey wishbones.
- When dry, I spray painted them white and sprinkled them with glitter while the paint was still wet. You can also use glue to make the glitter adhere.
- I tied the wishbones to my gifts with a small note. I used jute for one and ribbon for the other.
I made my favorite homemade turkey noodle soup for one of the gifts and put the soup in a canning jar. When I bring a meal to someone ill, I like to use containers he or she may keep and not worry about returning.
For my other gift, I filled a decorative jar with colored Epsom salt. A favorite recipe I LOVE to use is:
- Combine two parts Epsom salt with one part sea salt
- Add two or more drops of food coloring to get desired shade
- Add a few drops of essential oil
- Stir and fill container
Tuesday, March 12, 2013
Brighten Your Outside Table
I LOVE family celebrations (which always involves food) and I LOVE spending time outside. So when the weather finally warms, I wash the table, put up the umbrella, and light the candles. My family fills their plates and we all head outside for the patio - only to find that my candles have blown out. So when I recently saw a pin of a table centerpiece with holes drilled in driftwood for tea lights, I got an idea to decorate my table and solve my windy day problem.
This is what I did:
I found a piece of slab wood (30" long) with natural bark, but any piece of wood would work and any length to fit your table. It would look nice with Spanish moss glued to the surface.
I had my husband drill five 1 1/2" holes in diameter evenly spaced approximately 1/2" deep.
I hot glued two air plants in small shells and placed moss around them to help keep the plants moist. I then hot glued them in two of the drilled holes. I chose air plants because they do not require soil and can flourish in small containers when watered and/or misted weekly. My small shells fit nicely in the drilled holes.
I hot glued shells to the driftwood and placed battery flickering LED lights in the remaining three holes. It was fun to display my small collection of shells - a reminder of warmer days ahead!
This is what I did:
I found a piece of slab wood (30" long) with natural bark, but any piece of wood would work and any length to fit your table. It would look nice with Spanish moss glued to the surface.
I had my husband drill five 1 1/2" holes in diameter evenly spaced approximately 1/2" deep.
I hot glued two air plants in small shells and placed moss around them to help keep the plants moist. I then hot glued them in two of the drilled holes. I chose air plants because they do not require soil and can flourish in small containers when watered and/or misted weekly. My small shells fit nicely in the drilled holes.
I hot glued shells to the driftwood and placed battery flickering LED lights in the remaining three holes. It was fun to display my small collection of shells - a reminder of warmer days ahead!
Monday, March 4, 2013
Crayon Bunnies
Easter is coming and as a concerned Mom I've been trying to come up with ideas for items to put in my kids Easter baskets that are not loaded with sugar. Easter Bunny crayons came to mind! I remember doing this project as a kid, and remembered how much fun it was to color with crayons that are different shapes and sizes. My three young ones will LOVE these!
This is what you need:
- Broken crayons (any color)
- A cupcake pan (I used one with bunny shapes)
- An oven
- I preheated the oven to 200 degrees.
- I removed the wrappers from broken crayons I had on hand.
- I put the broken crayons in the cupcake bunny pan and filled them about half way.
- I baked them for 5-7 minutes.
- I cooled them for about 5 minutes and removed them from the pan.
Wednesday, February 27, 2013
Decorating With Birch
I LOVE decorating with natural elements. So when my husband trimmed a large birch branch that was hanging over our house, I willingly helped with the cleanup. I had plans for these beautiful gifts of nature!
This project would work with a variety of tree or bush branches and would look nice naturally or spray painted white.
This is what I did:
I also LOVE decorating outside and so last summer I leaned some branches in a corner of my deck to add some pop! A robin gifted me with a beautiful nest and I nestled it too in the crook of some branches. I considered hanging a bird house on one of the limbs but didn't want the mess if a bird moved in.
.
This Spring I might add some white lights to brighten up my deck. In the mean time, I'll try to be patient and wait for the snow and ice to melt!
This project would work with a variety of tree or bush branches and would look nice naturally or spray painted white.
This is what I did:
- I brought two 7 foot branches into my house, tied them together with fish line (so it wasn't noticeable), and leaned them against the wall in my dining room. I think it would also look nice leaning against my fireplace but I was looking for something to fill an empty space and create symmetry. I didn't want to spend a lot of money on an expensive artificial plant and many are not as tall as I wanted. I didn't worry about bringing in insects with my branches because we trimmed a healthy limb.
- I planted a Jade plant in a small pot and nestled it in the crook of the branches. I chose a Jade plant because it requires medium light and infrequent watering. I then secured it with jute rope to prevent slipping. I didn't like the rope visible so I hot glued some dried moss aound the rope and bottom of the pot.
- I also hot glued jute to some pinecones and draped them over limb.
I also LOVE decorating outside and so last summer I leaned some branches in a corner of my deck to add some pop! A robin gifted me with a beautiful nest and I nestled it too in the crook of some branches. I considered hanging a bird house on one of the limbs but didn't want the mess if a bird moved in.
.
This Spring I might add some white lights to brighten up my deck. In the mean time, I'll try to be patient and wait for the snow and ice to melt!
Monday, February 25, 2013
Honoring Birthdays
My family LOVES to celebrate birthdays, but busy schedules often make it difficult to find a date that works for everyone. So instead of celebrating each person's birthday individually, we often celebrate two or more together in the same month. Next month (March) we have three, and I decided to honor each one by displaying his photo on a table centerpiece.
This is what I did:
This is what I did:
- I bought three 4" x 6" clear frames for $.95 each.
- I had each person's photo printed for less than a quarter and put them in each frame.
- I found the base of my Lazy Susan (I want my centerpiece to twirl so everyone seated at the table can see all three).
- I put non slip shelf/drawer liner on top of the Lazy Susan to prevent objects from sliding when turned.
- I placed my lucky bamboo plant, my battery operated LED stick lights (I bought them earlier from Michaels), and three glittery shamrocks (I paid less than a dollar each from Michaels) in a small basket and put them in the center of the Lazy Susan base.
- I covered the top of the basket with dried moss that I bought from the Dollar Store.
- I filled the empty spaces with pinecones (left over from Christmas), dried hydrangea from my garden, and more moss.
Wednesday, February 20, 2013
Make A Simple Corsage
Are you planning a celebration for a special person? Whether you're hosting a shower, birthday, or anniversary party you can honor that person with a corsage or boutoniere you make yourself. It's so fun and easy! So instead of making a trip to your favorite florist, make one to a local store and choose a bouquet you LOVE. I recently did just that. I went to the floral department at Cub Foods and purchased three bunches; a colorful bouquet of flowers, a bunch of greens, and a bunch of Baby's Breath and I only paid $15 for all three. With a few supplies I had on hand at home, I created a corsage, centerpiece for my dining room table, and a small bouquet for my bathroom.
This is what I did:
I gathered supplies: a plastic bag, a scissors, a pearlized pin, floral tape, 1/8" wide ribbon 24" long, a 6" wire (I bought pins, tape, ribbon, and wire from Michaels or Jo-Ann Fabric And Craft Store), a piece of greenery 6" long, a stem of Baby's Breath 6" long, and a red carnation 6" long.
I made a small ribbon bow by wrapping it in a circle and wiring the center.
I placed the Baby's Breath on top of the greenery, the carnation on top of the Baby's Breath, and the wired bow on top of the carnation. I trimmed the bottom of my stems and wire. Then starting under the bow, I used floral tape to wrap the stems and wire. As I wrapped, I slightly stretched the tape to make it stick, continuing to the end of the stems.
I stuck a pearlized pin in the back of the wrapped stems for attachment to clothing. I sometimes add an extra pin.
I placed my finished corsage in a plastic bag, sprayed it lightly with water to keep it fresh (try not to get the ribbon wet), and stored it in the refrigerator until the party.
TIP: I've made a variety of corsages using several kinds of flowers and greenery. I recommend keeping it fairly simple and light so the corsage hangs nicely on clothing.
This is what I did:
I gathered supplies: a plastic bag, a scissors, a pearlized pin, floral tape, 1/8" wide ribbon 24" long, a 6" wire (I bought pins, tape, ribbon, and wire from Michaels or Jo-Ann Fabric And Craft Store), a piece of greenery 6" long, a stem of Baby's Breath 6" long, and a red carnation 6" long.
I made a small ribbon bow by wrapping it in a circle and wiring the center.
I placed the Baby's Breath on top of the greenery, the carnation on top of the Baby's Breath, and the wired bow on top of the carnation. I trimmed the bottom of my stems and wire. Then starting under the bow, I used floral tape to wrap the stems and wire. As I wrapped, I slightly stretched the tape to make it stick, continuing to the end of the stems.
I stuck a pearlized pin in the back of the wrapped stems for attachment to clothing. I sometimes add an extra pin.
I placed my finished corsage in a plastic bag, sprayed it lightly with water to keep it fresh (try not to get the ribbon wet), and stored it in the refrigerator until the party.
TIP: I've made a variety of corsages using several kinds of flowers and greenery. I recommend keeping it fairly simple and light so the corsage hangs nicely on clothing.
Make A Table Centerpiece
I LOVE fresh flowers. So whenever I host a party for friends and family, I create my own table centerpiece. It's fun, easy, and inexpensive. With a few supplies I had on hand, I recently made a centerpiece, corsage, and small bouquet for only $15.
This is what I did:
I gathered my supplies: a ceramic container, a scissors, a knife, wet foam (I puchased a package on sale from Michaels for a centerpiece I made earlier), water, fresh flowers, greenery, and Baby's Breath.
I used the knife to cut the foam to fit snuggly in my container. I poured water on the foam until it was well soaked. I then cut Lilies 10" tall and stuck them in the center of the foam. I keep my centerpieces low so that guests can easily see over them.
I cut other flowers 10" tall or shorter inserting them in the foam at an angle from the center.
I filled in empty spots with pieces of greenery and Baby's Breath. When I LOVED the end result, it was ready for my table!
This is what I did:
I gathered my supplies: a ceramic container, a scissors, a knife, wet foam (I puchased a package on sale from Michaels for a centerpiece I made earlier), water, fresh flowers, greenery, and Baby's Breath.
I used the knife to cut the foam to fit snuggly in my container. I poured water on the foam until it was well soaked. I then cut Lilies 10" tall and stuck them in the center of the foam. I keep my centerpieces low so that guests can easily see over them.
I cut other flowers 10" tall or shorter inserting them in the foam at an angle from the center.
Wednesday, February 13, 2013
Make A Bow
This is what I did:
- I measured out an 18" tail.
- I made a loop 22" in circumference and paper clipped it to the tail.
- I looped it around 7 more times and paper clipped each new loop to the one before. Less loops will make the bow less full.
- I measured out the second tail to 24" and cut the ribbon off.
- I paper clipped the loops together in the center having 11" on each side of the clip.
- I cut a piece of wire 18" long.
- I wrapped the wire and twisted it tight in the center and removed the paper clip.
- With the second, longer tail, I made a small loop in the center and wrapped the wire through it securing and twisting it to the center again. This step is optional.
- I separated and shaped the loops by pulling them apart.
- I trimmed the ends of the tails by cutting two points.
Subscribe to:
Posts (Atom)